A Simple Guide to Using Reflective Logs

Untitled design

“I have been reading various things on Facebook about reflective logs being needed for the ADI Standards Check, but I’m not really sure what they’re for and why the DVSA is forcing us to use them. From what I can make out, it’s something that the pupil fills in at the end of the lesson about what they have learned. Can you explain more about what a reflective log is and convince me why I have to use them?”

Thanks for your great question!  Let’s first start by reassuring you that nobody is forcing you to use anything that you (or your pupils) don’t want to use. The DVSA’s Standards Check is intended to assess your ability to instruct and whether that instruction helps your pupil to learn in an effective way. A reflective log is simply one ‘tool’ you can use to encourage your pupil to reflect on their own learning and progress, and plan for their way forward.

So what exactly is a ‘reflective log’?

Essentially, a reflective log is a record of the pupil’s learning experiences, thoughts, feelings and reflections. It should be thought of as a critical assessment of how the pupil is progressing. In using the word ‘critical’, this should not be thought of as a negative assessment – quite the contrary. It should be seen as an honest and positively-framed appraisal of what things are going well, where improvements can be made and a plan for moving forward (the next steps).

Reflective LogsReflective logs (or journals) are nothing new – they have been used very successfully for many years in other educational establishments, including some primary and secondary schools. Therefore, it’s quite possible that your pupils will be very familiar with the process, even if it might feel alien to you.

Why is it a good idea for us to use them with our learners?

Some ADIs will advocate using a reflective log as an additional resource for their pupils to complete and keep. For others, the reflective log can be used in place of a lesson record. From starting out as an ADI in the late 1990’s, I have always kept lesson records in A4 landscape format. They looked like this (I could fit 13 lesson records to a double-sided A4 sheet):

lesson recordThis enabled me to keep a track of not just what we covered and when, but specifically how well my pupils carried out those tasks and where they needed to improve. Together, we would then plan what to cover next lesson (although admittedly I frequently ‘led’ the pupil with this decision).

I later replaced this ‘Lesson Record’ with a ‘Reflective Log’ (see below). It’s essentially the same format but now phrased with more client-oriented wordings, and with space for the pupil to add in what steps they can take to improve between this session and the next. This may be something as simple as reading a handout or a section of the Highway Code, watching a particular training video or observing another driver’s handling of a skill (such as dealing with roundabouts). Or they may record detail on what specifically they will focus on during private practise with a friend or relative. The new reflective log also enables the pupil (or me) to note down anything else of relevance, e.g. ‘advised to put test back a couple of weeks’ or ‘block booking payment due next week’.

reflective log

From a learning perspective, keeping a reflective log will help your learner take more responsibility for the direction and content of lessons. It can also improve ‘flow’ throughout their course of lessons. As they become accustomed to using a log, you may find they progress quicker as they practise the skill of self-reflection. As a bonus, you get to better understand your learners’ thought processes – giving you a valuable insight into their view of the world.

When should it be filled in, and by whom?

Ideally it should be completed by the pupil at the end of a driving lesson. We say ‘ideally’ because sometimes the pupil won’t want to do it, and instead would rather the instructor took the notes. If an instructor is being truly client-centred, they will leave it up to the pupil to decide who writes it.

reflectivelogIt is most beneficial for the pupil to write the log themselves so that they don’t censor their thoughts and feelings. However, as long as the record is a true and honest reflection of the pupil’s thoughts and feelings, it shouldn’t matter too much who does the writing. Personally, I have found that most clients prefer me to take the notes whilst they are reflecting on the progress and expressing their thoughts verbally. I then summarise what they’ve said and enter it onto the log. This also saves lots of time.

If I am doing the writing, I will still write the log in the first person, e.g, expressing the comments as “I”. I will also be careful not to alter the pupil’s terminology or wording. To make the biggest impact, it’s important that what is written on the log comes from them, with very little input from me, as their instructor.

It is best if the reflective log is completed in-car, as you can ensure that it is completely thoroughly. Expecting a learner driver to go into their home, school, college or work and complete it usually results in them conveniently ‘forgetting’!

Doesn’t it take too long to complete? Pupils want to be driving, not writing!

I think it’s fair to say that most conscientious ADIs have been completing some form of lesson record at the end of each lesson for some time anyway, whether that be giving a score for each particular skill on the training record, or writing some notes on progress during that particular lesson.

Yes it’s true that some ADIs choose to complete lesson records after the lesson is over and the pupil has gone, but for me personally, the end of session debrief is such an important and integral part of the lesson that ADIs shouldn’t feel obliged to exclude record completion from the lesson time.

5minutesMake it a normal part of your lesson and your pupils will accept it. In every educational setting, lessons have a start (recap), middle (learning) and an end (recap/debrief), so why should driving lessons be any different?

Completion of a reflective log will probably take no more than 5 minutes.

My pupil is always itching to get out of the car at the end of the lesson. How can I maintain their attention?

We’ve all been there – as soon as the pupil pulls up at their house, their hand is on the car door handle and they’re readying themselves to jump out! Their attention is on the missed text messages or phone calls on their mobile phone. They are mentally ‘elsewhere’ – certainly not in the right frame of mind to complete any paperwork.

Fortunately, there’s a really easy solution to this problem.

Pull up a couple of streets away from their drop-off point and complete the reflective log there. Their full attention is still likely to be on the lesson, as there’s still more driving to do! Therefore, you’re less likely to see them ‘switch off’. Once the log is complete, they can practise a bit of independent driving to their final destination.

Where can I get one of these reflective logs?

There are various options you could choose from.

1Some instructors supply each of their pupils with a ‘Starter Pack’ when they start lessons (which might include a branded pen, terms and conditions, Highway Code, referral vouchers, etc). Adding an inexpensive blank notepad to this pack, labelled ‘Reflective Learning Record’ is one idea. Who keeps the learning record is entirely up to you, although in my experience 17 year olds can be quite forgetful. If you intend to leave the learning record with your pupil, you’ll need a plan in place for when they forget it, or it gets ‘eaten by the dog’.

2The DVSA have conveniently supplied a sample reflective log in their ‘ADI1 Standard Operating Procedure’ (see page 77). You could print that off and maybe even develop your own, based around the headings used on the DVSA version.

3You could click here to download our version. As I mentioned earlier, our reflective log is based on our previous ‘Student Lesson Record’ which has been publicly available for download on our www.activedrivingsolutions.com website for some time. It is double-sided and A4-sized to fit conveniently in a binder or plastic wallet, and you can record up to 6 driving lessons on each sheet. Simply print them out as you need them.

4reflectiveIf you have access to an iPad, check out the ‘Robosoul Reflective Logs app’ designed by Neil Snow. It’s currently available for £2.49 on the iTunes App Store.

Using the app has the added benefit of you being able to directly email completed logs to your students from within the app, keeping them up to date and enabling them to build a personal record of their progress. It can definitely be useful for you both to have a copy of the log.

Will the examiner want to see my pupil’s reflective log on my Standards Check?

Not necessarily. This is what is written in the ADI1 Standard Operating Procedure (page 69):

If the ADI offers to supply training documents (such as the reflective log) you should discuss the content with them but if they do not bring such papers this will not invalidate the standards check.

If you and your pupils do use reflective logs successfully, we would definitely recommend taking your pupil’s log into the test centre to show the examiner before the lesson commences. If you’ve read our industry contributions in the past, you’ll know how much emphasis we place on making a great first impression – it can definitely make a big difference to the examiner’s initial perception of your skills before they even get into the car. If you want to do well on your Standards Check, your aim should be to set a fantastic impression from the outset.

Do you use reflective logs with your pupils? What format have you found works best? Do you complete it, or do you encourage your pupil to do so?

If you haven’t used reflective logs in the past, might you consider it? What other questions do you have that we haven’t answered?

down arrowPlease share your thoughts, questions and reflections in the comments below. And remember, if you can think of someone that would benefit from this article on using reflective logs, please hit one of the buttons below and SHARE it!

Follow Ged Wilmot on Google+!

“Just check your b****y mirrors!!!” (Part 2 of 2)

26-02-2014 21-17-46In the first part of this article, we explored how to effectively develop our learner drivers’ mirror use.  If you missed it, we’d strongly advise you read that part first – click here to read Part 1.

In the second part of this article, we will be looking further into the cyclic nature of the Look – See – Respond routine.  Also, we’ll check out some higher level techniques to ensure your pupils not only continue to use their mirrors with better levels of understanding, but will learn to develop their own effective strategies to deal with situations arising behind them.

The ‘Silent Conversation’

In Part 1, we took some time to explore some examples of questions to use at the RESPOND phase of the routine. Although many instructors encourage their learners to look for cars, cycles or other vehicles behind or to the sides, it’s not these objects that cause crashes – it’s the driver of that vehicle that is responsible for their course of actions.

It can be helpful to consider the cyclic nature of the mirror routine as a ‘silent conversation’ between you and the other driver or rider. Not only do we need to respond appropriately to what we see in the mirrors, we also need to take into account how the driver/cyclist behind responds to our response. And having LOOKED and SEEN how they respond to our actions, we will then need to again RESPOND accordingly… and so it goes on!

So, assuming it’s daytime and you have a decent view of the driver behind, try asking your learner questions such as:

What’s the driver behind doing?
Is the driver behind paying attention?
What do you notice about the driver behind?”

Female driver talking by mobile telephone and doing make-up.It may be that they are arguing with a passenger, distracted by their children, bopping away to a really good tune, lighting a cigarette, picking their nose (ewww!), texting/chatting on the phone, putting on makeup (okay, some women are distracted sometimes, too!). I’m sure we’ve all seen what other drivers do while at the wheel.

Once you’ve identified what the driver is doing, explore how this will affect your pupil’s decisions – in effect, how they will ‘communicate’ with that driver. You could ask:

How can we make allowances for him?
What can we do differently with our speed on the approach to these lights?
How early should we start signalling for our turn?”

Once the learner has replied to your question and/or taken action, encourage them to LOOK and SEE how the other driver has RESPONDED to our ‘communication’:

What’s happening behind now?
Have they recognised what we’re doing?
How is he responding / What is he doing now?
Do we need to do anything else now?”

A painful experience

A few years ago, one of my former franchised instructors was giving a lesson to one of his pupils.  During this lesson, they had a crash which could potentially have resulted in very serious injury or even a fatality.

The learner driver was just a few weeks away from taking his driving test.  During this particular lesson, he was approaching a zebra crossing with a pedestrian walking towards it.  The instructor was watching the learner driver to see if he had checked the mirrors.  On noticing the learner’s lack of mirror use, the instructor failed to intervene, because (in his words after the crash) “he had his driving test booked and should have known what to do!”  There was no mirror check or any early positive indication that the learner had seen the crossing or the approaching pedestrian.

Only at the last moment did the learner driver see the pedestrian.  He then slammed on the brakes… hard.

AmbulanceMeanwhile, the learner and instructor had both failed to realise was that there was an enormous quarry lorry close up behind them.  Needless to say, when the learner driver slammed on the brakes the lorry couldn’t stop in time.  The lorry crashed heavily into the back of the instructor’s car pushing it through the zebra crossing.  Fortunately the pedestrian hadn’t started crossing – imagine the outcome if they had 🙁
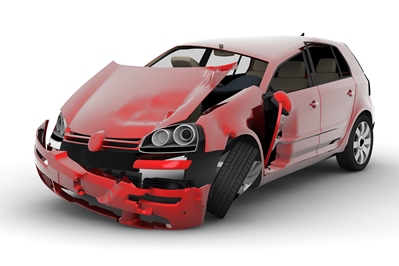
This whole situation could have easily been averted.  Regardless of the standard of the learner driver, it is always the instructor’s responsibility to keep everyone safe.  On identifying the pedestrian crossing early and failing to see any response from the learner driver, the instructor could (and should) have asked something along the lines of:

What hazards do we have up ahead?
How close is the truck behind?
What will you do with your speed?
How is the driver behind responding?”

Developing Coping Strategies:

I’m sure most of us have experienced how learner drivers can get flustered with drivers following closely behind.  We explored this more fully in our ‘Dealing with aggressive tailgaters’ article.  As covered in that article, you may want to explore how to get out of the way if the driver behind seems totally distracted.  By doing so, they are no longer a concern, especially if your pupil seems on edge about having them behind. In both of the examples below, the ‘silent conversation’ between me and the driver behind helped avoid potential crashes…

Example 1: Looking for a POSITIVE RESPONSE

Whilst driving home from work recently, the driver of a supermarket delivery van was following about an inch from my bumper (OK, so that might be a slight exaggeration, but he was still really really close!)  I could see that he was occasionally glancing at the road but that most of his attention was directed at something on the passenger seat – maybe his delivery schedule.

My first thought was, “I don’t want this guy behind me; I’ll pull up and let him pass”.  I didn’t pull up as normal though – I signalled left and kept my speed at 30 mph.  I continued to drive until I got a positive response.  I saw that he had seen my signal because he began looking in his right mirror to look for an opportunity to pass me.  Only then did I slow down to pull up – he ‘spoke’ to me before I responded.  Had I not waited for the positive response and reduced my speed before he recognised my signal and intention to pull over, I would undoubtedly have ended up with an embarrassed van driver and a ton of groceries in my boot!

Example 2: Using observation links

A couple of years ago, whilst waiting to turn right into a side road, I saw a car approach a T-junction further up the road.  It shot straight over the give way lines and only stopped when almost at the centre line on the major road!  I made my turn and watched in my mirrors to see if the car would turn into the road behind me.  It did.  Before reaching the end of the road where there was a mini roundabout with just a left or right exit to choose from, I instinctively decided to turn into an empty car park without losing much speed, as I didn’t want the car behind to get too close to me.

The driver behind may have not have stopped at the previous junction for a number of reasons – perhaps he didn’t realise it was a give way junction?  Maybe he was distracted, drunk or under the influence of drugs?  Regardless of his reasons for doing so, I wasn’t feeling comfortable being in front of him so I turned off as soon as I could.

Car AccidentSo what happened next?  He continued to the roundabout, failed to stop and drove straight into the lamp post on the other side of the roundabout!

These are just 2 examples of when crashes may have been averted (away from me anyway!) by using the LOOK – SEE – RESPOND – LOOK – SEE – RESPOND cycle.  These examples also illustrate the importance of using ‘observation links’ within this cycle (clues as to what other road users are likely to do next).  This is what our pupils need to be able to do as well. They need to interpret the other driver’s response in our ‘silent conversation’ – does the driver behind recognise what you’re doing?  Is he responding appropriately or is he ignoring you?

ATTITUDE WARNING!

Road Rage FrustrationSometimes, thought-provoking questions relating to the behaviours of drivers behind can highlight your learner drivers’ poor attitudes towards other road users.  Your learner may scold the driver behind for using his mobile phone or for driving too closely, or for whatever other bad habit the driver behind is displaying. Instead of displaying similar levels of aggression by rebuking the other drive, think how you could use the other driver’s behaviours as a valuable learning opportunity.

What effect could that have on him? What about us? What could be the possible consequences?

You could then ask your pupil to identify what possible ‘bad habits’ they may develop once they’ve passed the driving test?  Just how attached are they to their phone? What if it rang whilst they were driving?  In what situations might they be tempted to answer it?  How are they for time-keeping?  What if they were running late for work, an interview, appointment or party?  How rowdy are the friends that they will be offering lifts to?  How might that impact their driving?  What strategies will they have in place to deal with it?

Are you up for the challenge?

Challenge Blue MarkerLet’s look back at the example questions we provided in Part 1 of this article when encouraging your pupils to LOOK and SEE what’s there…
What’s going on behind?
How close is the car behind?
How fast is the car behind going?
Are there any bikes coming down on our left?
Is there anything overtaking us?”

What’s missing from all these questions?  That’s right – the word ‘mirror’ isn’t mentioned at all.  Our challenge to you would be to try and eliminate repetitive reference to the ‘mirrors’ from your everyday teaching and instead to use awareness questions.  You can start doing this from the very first lesson!

‘Bottom-up’ instruction

Try to avoid the ‘bottom-up’ approach to teaching.  This is a typical trait of some PDIs and ADIs (especially those training for Part 3 or who have recently qualified).  For example, when teaching their pupils how to move off, they will often instruct in the following way:

Have a quick check in your centre mirror, then check your left blind spot, left door mirror, centre mirror again, the road ahead, right door mirror, and your right blind spot”

This simply gets the pupil to LOOK, but no further parts of the routine are explored.  Some lessons later, the instructor goes on to help their learners understand what they’re looking for (SEE) and then some will get around to exploring how the learner driver should RESPOND to what they see in the mirrors.

Signal or not?Other bottom-up approaches include encouraging the pupil to routinely apply the right signal when moving off for the first time (“just for practise”), rather than to LOOK, SEE and RESPOND appropriately to what is around us at the time.  Read our article on signalling for more guidance 😉
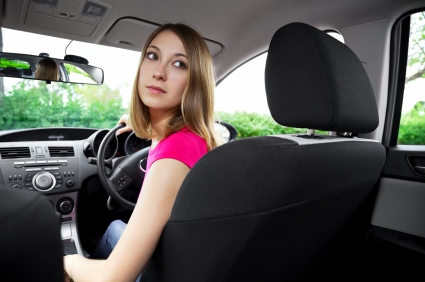
Unfortunately, such short cuts make life MUCH harder for the ADI and the learner in the long run – the bad habit of just looking blankly in the mirrors will have already formed from those early lessons and may be very hard to break at a later stage.  This is why we may often see the pupil quickly glance at the mirrors (and apply the right signal), but we know full well that they cannot possibly have had the opportunity to fully assess what they can SEE (and therefore signal accordingly).

‘Top-down’ instruction

Top-down teaching, on the other hand, is where we would start with the reasons for effective all-round observation, followed by directions on what specifically we need to be looking out for, and how to respond to (or ‘communicate’ with) what we see. A top-down approach is more likely to create a natural response and natural awareness within your learners, which naturally becomes much harder for them to forget! An example might be:

So now we have the car prepared, it’s important for us to look for a safe opportunity to move away, so we need to be aware of what’s happening all around us… so let’s first look to see if there’s a safe gap behind… then have a sweeping check all around… Anything coming out of the driveway over our left shoulder?  Any cyclists coming down our left side? Still clear behind?  Is it safe ahead?  What about our right side – any vehicles coming up to overtake?  And is there anyone emerging from the junction over your right shoulder?  What would be our best course of action?  Would it be safe to go now, do you think?  Would a signal benefit anyone?” etc…

learner-blind-spotAlthough this is an example of an instructional approach, a coaching conversation would work really well, too.  Yes, top-down approaches will take a little longer in the short-term, but the long-term benefits definitely outweigh this.
So, ask yourself if there is there any more you could be doing to encourage your pupils to have a better awareness of other drivers’ behaviour.  How could you work on helping them to communicate better with others on the road?  How can we help them be aware of their choices once they’re out there on the road themselves?

*Disclaimer:  Throughout these articles, I have referred to drivers who exhibit poor driving behaviour as ‘he’.  This is just for ease of writing – it isn’t because I think men are impatient and generally daft drivers at all… honest! 😉

down arrowHave you any further advice for Paul (who originally asked the question about mirrors) that you would like to share?  What techniques or strategies have you used with your learners that has been successful? How do you incorporate the skills that kill (using phones, speeding, driving under the influence, showing off, etc) into your everyday teaching?

Please let us know in the comments below – I’m sure it will be appreciated by many.

If you like this article, share it so someone you know might benefit too by hitting one of the social media buttons below.

“Just check your b****y mirrors!!!” (Part 1 of 2)

check-your-mirrors“Hi Ged and Claire, I’m getting really frustrated with my pupils not checking their mirrors, they do it sometimes when I ask or tell them to, but then go right back to forgetting again when I stop helping them.  What can I do?”

This is probably a very common frustration for a lot of ADIs, so rest assured you are not alone!  I know I’ve had the same issues in the past, too and you can feel like a bit of a nag or a broken record repeating yourself every 2 minutes!

The problem with some pupils is that no matter how many times we tell or ask them which mirrors to check, unless we keep at it, some will keep forgetting. So what can we do differently so they are less likely to ‘forget’?

I like to think there are 3 elements to effective mirror use:


26-02-2014 21-17-46

LOOK

Many instructors stop after teaching this first part.  So invariably the pupils LOOK but don’t SEE.  This is more likely to happen when the instructor says things like:

Check your centre and right mirror before signalling
Which mirrors should we check?
New road, new mirrors
Remember – Mirror… Mirror… Signal
Come on, check this left mirror, you keep forgetting!

Any of these sound familiar to you?

Although these questions or commands may well instigate a mirror check, the check in itself has very little value.  The pupil is simply learning by rote, or ‘parrot fashion’.  They know they need to check them – after all, you’re there to keep reminding them!  But this is not an effective approach for long-term learning.  They are checking the mirrors because they think they have to check them to pass the driving test (and to stop your constant nagging!).  You’ll get a similar effect with chants or ‘easy reminders’ like “One Two Three” relating to centre mirror (one), door mirror (two), signal (three).  Another one we hear being used a lot on lessons is “Mirror, mirror, signal”.

Learners who are taught in this way can pass the driving test.  And afterwards, they’ll breathe a huge sigh of relief and think, “Yes! I passed! Don’t need to check my mirrors all the time now!”

SEE

Many instructors get to this part easily, although not always often enough.  This is where we start getting to the WHY.  In the ‘look’ part of the sequence, they learner looks in the mirrors but they won’t always ‘see’ what’s there.

InattentionalBlindness_021012_For the most part, the reason for this is that the learner has no idea what they are specifically looking for.  They’ve simply been told or asked to check the mirrors (as in the examples above).

So how can we direct their attention a little further?  Here are some examples of better questions to ask:

What’s going on behind?
How close is the car behind?
How fast is the car behind going?
Are there any bikes coming down on our left?
Is there anything overtaking us?”

These are much more efficient questions than some of those I used to ask in my early days as an ADI, such as, “What colour is the car behind?” [‘Red…. so what?!’].  And then there were also times when I would cover the interior mirror with my right hand and ask, “What’s behind?” These tactics don’t necessarily encourage the pupil to do much more other than check the mirrors more frequently to avoid getting caught out! There’s still no guarantee they’re considering the proximity or speed of vehicles behind.

And this brings us to a secondary issue that we need to be aware of – and that is ‘inattentional blindness’.  This is a psychological phenomenon which relates to our failure to notice unexpected visual stimuli when we are focussing on another task.  Driving demands a great deal of attention and focus for the novice driver, and their focus is largely on the control of the vehicle and the things going on in front of them.

Many of you will have seen this video (or ones similar to it) before, but if not, here’s a great illustration of inattentional blindness in action:

We could write a whole article on the perils of inattentional blindness when driving, but let’s focus back on the topic of effective mirror use for now…

In essence, we tend to notice what we are looking for – what we are expecting to see.  By asking poorly-phrased or poorly-directed questions, the learner driver does not notice the things which they should be noticing – those things which are of a high priority and could have an effect on our driving plan.  As experienced drivers and instructors, we may notice that the driver of the bus behind is glancing down at a newspaper, or that the driver of the car behind is more pre-occupied with their screaming children in the back seats than they are focussed on the fact we are braking to a stop.

driving-instructor-questionsAppropriately phrased questions will help bring these higher priority things to the learner’s attention – things which they may not have even considered paying attention to, or were ‘blind’ to due to overwhelm.

So ‘seeing’ isn’t about knowing if your pupil has checked the mirrors or even seen what’s there.  Instead, it’s about creating a connection between using the mirrors and knowing what to look out for.  It doesn’t really matter if they’ve seen the car behind, or if it’s red, blue or polka dot, what matters is that they realise they need to recognise what the car (or driver) behind is doing, e.g. distracted, driving close, approaching too quickly, overtaking, etc.

Now the pupil is looking and seeing what’s there, they’ve started to understand WHY there’s a need to check the mirrors… or have they?

RESPOND

If the pupil knows what they’re looking for, it might mean they understand what to check for, but not necessarily why that’s important and how to interpret and respond to it.

Let me share a short story…

I once asked a pupil of mine to turn right at the next traffic light controlled junction.  We were travelling along a dual carriageway and we needed to change lanes.  She looked in her centre and right mirror. “Great,” I thought to myself, “she knows which mirrors to check and so she’s seen the red car travelling at high speed who’s about to overtake us”.  She then went to signal and steer.  I pulled the wheel back and cancelled the signal and said “there’s a red car there!” She replied “Yea I know!” I was gobsmacked.  If she saw the car, why on earth did she try to change lanes as it was about to overtake us?!

Her actions and words told me that she had looked in the correct mirrors and had seen the red car, but she simply didn’t know how to respond to what she had seen.  She had actually thought the driver would let her go once she started signalling so we worked through what could have happened and what to do next time.

Fortunately this happened on a driving lesson and not after she had passed her test. Imagine that scenario on a crowded motorway! :O

The point is that until then, I didn’t realise how important it is to make sure (and not just assume) that the pupil knows how to respond to what they see in the mirrors.  It meant that I hadn’t been doing my job properly and it was a valuable lesson for me to make sure every pupil knew how to respond correctly to what they had seen.

Because this golden opportunity doesn’t present itself all that often, and because there never seems to be a cyclist coming down the left hand side when your learner is turning left, sometimes we as instructors can forget this important step in developing our learners’ effective use of mirrors. The ‘what if’ question can be the most important question to ask.

How close is the car behind?  What would you do if it was really close?
Are there any cyclists coming up on our left?  What would you do if there were?
Is there anything overtaking us?  What would you need to do if there was?

If you get a blank expression or “erm… I don’t know” as a response, then brilliant – you can save this driver from making a costly mistake once they pass their driving test!  You know that they don’t really understand the significance of using the mirrors effectively, and this can be a big enough reason for them to ‘forget’ to check and for you to keep having to remind them over and over again.
You can also explore different options and how they may need to respond:

If the driver behind was really close, what would we do differently with our speed/signal before our next turn?
What would be the benefits of doing that?

If there was a cyclist coming up quickly on our left, how might it affect the timing of our signal?
What would be the problem of signalling to turn left if he was very close to our car?”
“What if he was a lot further away? Would you do anything differently?

What would you do with your speed/signal if you were being overtaken and you wanted to turn right?
How do you think that would benefit us and the driver overtaking?

Once we turn, if the new road is clear and the car behind is following really closely, what could we do with our speed?
If the driver behind looked like he was about to overtake us, what would we do with our speed then?

ged-claire-mirrorsFinally, it’s important to notice that the diagram at the start of this article is cyclicThe process is continuous – after responding, we need to once again LOOK and SEE how the driver or cyclist behind/on our left/passing is in turn responding to our action.
Now what you should achieve is lots more value attached to mirror use.

The pupil has a deeper understanding of their importance, will want to become more aware of what’s going on around them and more importantly, will be able to make decisions on how to respond to what they see.

down arrowIn the second part of this article, we will be looking further into how being aware of the actions of other road users around us affect our learners and how they can develop strategies to deal with these situations.  Click here to read Part 2!

For now, please share your experiences!  Please let us know how you develop your learners’ effective use of the mirrors – what questions do you find get the best results?  Your comments in the box below could really help other instructors improve their skills 🙂

Motivating the Unmotivated

Motivating the Unmotivated - Leaner drivers - lad smoking leaning on car “Hi Ged & Claire.  What do I do about a pupil that doesn’t seem to want to learn?  He keeps paying me for lessons, but pulls up and demands to get out for a smoke when things aren’t going so well.  I think he spends more time smoking than he does driving.  I really feel like I’m wasting my time with him and I hate feeling like this.  I love my job and I just want to teach!  But how can I motivate him to want to learn?”

Motivating the Unmotivated Learner Driver

This is a great question, and is an issue that I’m sure many ADIs have encountered, myself included. Let me first share my story of ‘Marc’ (not his real name) – a pupil I taught to drive about 13 years ago – and then I will offer a few suggestions on how to address this problem.

Marc had been learning to drive with me for about 6 months.  I had always been very proactive in encouraging my pupils to study towards their theory test, and Marc had scored really well on all the mock tests that I had given to him after each lesson.  But actually getting him to book his theory test was another matter.  “I know, I know, I’ll book it tomorrow” was Marc’s usual response.

image descriptionDuring his lessons, Marc seemed quite disinterested.  He seemed to ‘plateau’ for a few lessons, and I was struggling to help him to improve.  At the end of one particular driving lesson in which Marc hadn’t really shown much improvement, we pulled up outside his house.  He wasn’t forthcoming with his feedback when I encouraged him to self-reflect on his progress.  So I chose to ask him, “Why is it you want to learn to drive, Marc?” “I don’t”, came his reply.  “So why are you having driving lessons?” I asked him.  “Cos my dad wants me to”.  Marc’s dad ran a successful Italian restaurant and a takeaway pizza parlour.  It turned out that Marc’s dad had him lined up to do the pizza deliveries, hence was financing Marc’s driving lessons.

Marc didn’t want to learn.  And neither I nor his dad could make him learn.

Tips about Motivating the Unmotivated Learner Driver or Anyone!

Instinctively, I took out my A4 notepad, removed a page, and wrote at the top, “What passing my driving test will mean to ME” and then wrote the numbers 1 to 5 down the left-hand side.  “Marc, I want you to take this home and think about five opportunities that passing your driving test will open up for you.  Think about the benefits to YOU – what positive changes will it bring?”  Marc grimaced at my request but took the piece of paper, folded it up untidily and pushed it into his pocket.  “OK, see you next week” he said, as he walked down the driveway to his house.

energy-vampireTo be quite frank, I didn’t enjoy teaching Marc.  He was the perfect definition of what I would term a ‘mood hoover’ or ‘energy vampire’ – over the course of a 1 hour driving lesson, he had this amazing ability to suck every piece of enthusiasm out of me and turn me from a happy, inspiring, smiley driving instructor to a sullen-faced, unmotivated instructor, who felt like packing it all in and getting a ‘proper’ job.

On the morning of his next lesson the following week, my heart sunk when I saw Marc’s name pencilled in from 3.30pm – 4.30pm, straight after he finished college.  Whilst I waited for him in my usual parking spot, I rehearsed my end-of-lesson advice – to stop his driving lessons and save his dad’s money.  After all, if his heart wasn’t in it, then he was unlikely ever to succeed.

But as Marc appeared from the college gates, there was something different about him.  He had a spring in his step and a smile on his faceThis wasn’t the Marc that I knew… As he opened the door, the first words of his mouth were, “I did that thing you asked me to do”.  “What thing?” I asked (I had forgotten all about it).  “The thing about why I want to drive.  I did it.”  He took the folded sheet of paper from his trouser pocket and proudly passed it to me.  I prepared myself to read the 5 things that Marc would gain from passing his driving test.  But instead of just 5 things, Marc had FILLED the sheet of paper with positive outcomes.  I was absolutely GOBSMACKED.

I’ll be able to drive to my girlfriend’s house
I’ll be able to drive to college and back
I won’t get piss wet through in the rain waiting for the bus
I won’t have to listen to Radio 2 on the way to college ever again
I’ll be free to get out of the house whenever I want
My mates will respect me more
It will give me my confidence back
I’ll be able to get a job and earn some money…

This list went on and on, and some of the reasons honestly brought a lump to my throat.  “I’m ready” he said.  “And I booked my theory test – it’s on Monday after college”.

I have to admit, this was a real moment in my life as an ADI.  Through one simple exercise, Marc TRANSFORMED.  And that’s no exaggeration.  He finally had his own reasons for wanting to pass his driving test, and none of them involved his dad.  He passed his theory test the following Monday, then passed his driving test at the first attempt a couple of months later.

I am fairly convinced that had I not encouraged Marc to find his own motivation, he would still be having lessons today.  And his dad would probably have sold the restaurant and pizzeria by now in order to pay for his driving lessons!

You CANNOT motivate others!

This has been a well-researched theory, and I believe it to be true.  We cannot make people change.  All we can do is help open them up to change.  We cannot directly motivate our pupils to want to drive, in the same way that their parents cannot make them want to drive.  I have been to see a fair few motivational speakers in my time – last year I spent a week in the USA in the presence of several wealthy motivational speakers.  The fired-up, ‘I can do anything’ beliefs that we leave such events with are only short-lived.  Before too long, we return to the way we were.

What motivational speakers do succeed in though, is in encouraging us to take the next step.  The next baby step.  And sometimes this is all it takes to start the ball rolling.  In effect, this is what I did with Marc.  I started the ball rolling.  Don’t get me wrong – Marc wasn’t magically ‘fixed’ by this single exercise – we worked hard together over the following few weeks and I regularly had to help him to re-focus on his main motivational ‘drivers’.  But the exercise was the catalyst that sparked the change.

Motivation versus Inspiration

Whilst working with my personal coach, she helped me recognise that our aim should not be to motivate, but instead to inspire.  Which led me to explore the differences between ‘motivation’ and ‘inspiration’.  There are a few different schools of thought on this, but here’s how I would define each:

Motivation is EXTERNAL
– It relates to the things we think we should do or that we’re supposed to do

Inspiration is INTERNAL
– It’s all about the inner desire, our passions, our calling

Motivation is the PUSH
– It is usually only very short-lived

Inspiration is the PULL
– Nothing can stop us from taking action
when we’re inspired!

The short exercise I asked Marc to carry out encouraged him to become INSPIRED – to find and act on his inner ‘pull’, not the external ‘push’ from his Dad.

jagoadvisor_inspiringcleints


6 Steps to INSPIRE your pupils to move forward

Step 1:  ASK
Help your pupil to get clear about what they want.  I’m not simply talking about ‘passing the driving test’ here – we want the pupil to focus on what it MEANS to them to gain a full driving licence.  What positive outcomes will it bring to THEM.  It’s imperative that they focus on their OWN desires, and not those of their friends, parents, or even us!  Most important of all, get your pupil to write them down.  How will it benefit them to have a full driving licence?  How will it positively affect them as a person?  What opportunities will it open up to them?

Step 2:  LISTEN
Actively listen, pay attention to what your pupils are saying and how they are saying it.  Notice any body language cues.  People feel great when they are truly listened to, especially teenagers – many have strained relationships with their elders, often having been pushed by parents and teachers.  Give them the time and space they need to let you know what drives them.  Most importantly, leave your thoughts and opinions out of it – this isn’t about you!

Step 3:  REMIND
Even though inspiration will drive us for longer than motivation, we often need a reminder from time to time.  If you’ve listened to (and made notes on) your pupil’s innermost reasons for learning to drive and passing the test, then you should be able to use these throughout the pupil’s lessons with you.  Creating empowering pictures, sounds and feelings in relation to these goals will drive the pupil to success much faster.  To use Marc as an example, I could ask, “how will you look, sound and feel once you’ve passed your test and you’ve got your confidence back?” or even, “so when you no longer have to listen to Radio 2 in mum’s car, what will you choose to listen to once you’ve passed your test?”

Step 4:  BELIEVE
chartSome people are naturally negative.  If we’re not careful, these ‘emotional vampires’ can suck out our positivity and belief that they will ever succeed in passing the driving test.  They can even lead us to give up altogether and hope (or suggest!) they go and find another driving instructor to be miserable with.  Don’t let them get you down!  Instead, see them as being successful – able to achieve anything, irrespective of what they may tell themselves.  It’s amazing how your perception of them will come through in your voice, tonality, attitude and body language.  Switch your normally negative perception of them to a positive one, and you will start to notice a huge shift in their confidence.  Try it!

Step 5:  RECORD Earlier on, I talked about baby steps.  And this is important.  When learning something new, we all need to set and recognise ‘mini-milestones’ along our journey to our ultimate destination.  Recording progress of this journey is important. Love them or loathe them, keeping good lesson records is a must (in my opinion).  A written record of progress is so powerful in helping people like Marc keep track of their successes.  It enables them to see their proximity to the end goal.  If (like me) you’ve ever tried to lose weight, taking note of your weight loss progress on a weekly basis is tremendously motivating – it gives us an idea of our chances of reaching the end goal.  Progress is accelerated even further if we ‘track’ or keep a daily record of what we have eaten.  If we just decide one day to lose weight and don’t bother to track our progress, we’ll soon lose interest and never reach our target.  I believe it’s the same with learning to drive and keeping well-structured lesson records.

Step 6:  LEAD
As a driving instructor, you have a much more important role to play than simply teaching someone to drive a car.  You need to lead by example.  Develop, improve, be ambitious, aim to be the best.  Set yourself daily, weekly, monthly and yearly targets.  By being a leader and demonstrating your desire to succeed, your learners will follow.  YOU want to be that person they name when asked in later life, “who inspired you when you were younger?”

down arrowSHARE YOUR EXPERIENCES!  Have you had a pupil that just didn’t want to learn?  How did you overcome it?  What strategies did you try to help inspire them?  What worked?  What didn’t work? Please share your advice and experience – we’d love to hear from you.

Finally, if you liked this article about Motivating the Unmotivated (learner driver) or anyone for that matter, and know someone else that could benefit from it, please hit one of the social sharing buttons below!


Overtaking – Are your learners fully equipped?

Overtaking Guidelines - car crashBack when Ged and I were training to become ADIs, the steps for overtaking in ‘The Driving Manual’ were stated as MPSLMSM. This remained the case in seven editions of the updated version of the book (retitled, ‘The Official DSA Guide to Driving: The Essential Skills’). But in the 6th impression (released in 2013), this guidance mysteriously (and without explanation) changed to simply MSPSL

So which method is best, and which routine should we be teaching?

The ‘Old’ Guidance

The following extract is taken from the 6th edition of The Official DSA Guide to Driving: The Essential Skills, released in 2007):

Mirrors – Always check in your mirrors to assess the speed and position of traffic behind.

Position – Be near enough to the vehicle ahead to overtake smoothly when you’re ready, but not so close that you can’t get a good view of the road ahead.

Speed – Be fast enough to keep up with the vehicle in front and with enough reserve power to pass it briskly. You might need to change down to get extra acceleration when you’re ready to start overtaking.

Look – Assess the whole situation

• the state of the road

• what the driver ahead is doing or might be about to do

• any hazards

• the speed and position of oncoming vehicles

• speed difference between you and oncoming vehicles.

Mirrors – Check your mirrors again to reassess the situation. Check especially for motorcyclists as they approach very quickly and may have been hidden from view previously. Be aware of, and check, any blind spots by taking a quick sideways glance if necessary, before deciding to pull out to overtake. Never begin to overtake is another vehicle is overtaking you or is about to do so. Overtake only when you are sure it’s safe to do so.

Signal – Always give a signal. This helps

• drivers behind

• the driver you are overtaking

• drivers coming towards you.

Manoeuvre – Make a final check in front and behind. If it’s safe, pull out on a smooth easy line.

• overtake as quickly as you can

• Check your mirrors to see that you’re clear of the vehicle you’ve overtaken

• Move back to the left again on a smooth easy line, but avoid cutting in.

This is all sound advice, especially when overtaking on a two lane, two way road and to overtake would require the driver to cross onto the opposite side of the road.

The ‘New’ Guidance

drivingThe latest version (6th impression, 2013) of The Official DSA Guide to Driving: The Essential Skills recommends the MSPSL routine:

Mirrors – Check your mirrors to assess the situation behind and look well ahead.

Signal – Give a signal if it will help:

• drivers behind

• the driver you’re overtaking

• drivers coming towards you

Position – Be near enough to the vehicle ahead to overtake smoothly when you’re ready, but not so close that you can’t get a good view of the road ahead.

Speed – Be fast enough to keep up with the vehicle in front and with enough reserve power to pass it briskly. You might need to change down to get extra acceleration when you’re ready to start overtaking.

Look – Assess the whole situation

• the state of the road

• what the driver ahead is doing or might be about to do

• any hazards

• the speed and position of oncoming vehicles

• speed difference between you and oncoming vehicles.

Make a final check in front and behind. Check especially for motorcyclists as they can approach very quickly and may have been hidden from view previously. Be aware of, and check, any blind spots by taking a quick sideways glance if necessary, before deciding to pull out to overtake. Never begin to overtake is another vehicle is overtaking you or is about to do so. Overtake only when you are sure it’s safe to do so.

So why the change of guidelines for Overtaking?

shutterstock_31395766aWe believe that each method has its place. Most overtaking opportunities arise on multi-lane roads. Because there are extra lanes to use, it’s not necessary to have to cross onto the opposite side of the road. For these types of road, the MSPSL routine is perfectly adequate. However, on two lane two-way roads, the MPSLMSM becomes more relevant and effective. It is imperative that the driver plans more thoroughly with the possibility of meeting oncoming traffic, and that they overtake quickly so they can return to their own side of the road safely and in good time.

It’s worth recognising how an overtaking manoeuvre can be different, depending on the type of road and layout, and discussing this with your pupils. Bear in mind that if you are working towards your ADI Part 3 test, or you have a Check Test and are including overtaking as part of the lesson plan (e.g. a Pass Plus module on Motorways, rural roads or dual carriageways), you must know the correct recommended sequence. We have met several DSA examiners who are not aware of the changes, so it’s a good idea to refer to both the old method and the updated method as recommended in The Official DSA Guide to Driving: The Essential Skills, and considering the distinction between them.

Something much more important!

Regardless of which routine is used, what doesn’t change is the importance of selecting a suitable place to overtake and judging a safe gap in approaching traffic, especially on a two lane, two way road.

The DECISION to overtake can be the killer, rather than the routine itself.

shutterstock_121576933aI always remember reading a local news story about a young driver who overtook another vehicle on one of the rural roads near to where we live. He had four of his friends in the car and he hit a single-decker bus coming the other way.  The driver and two of his friends were killed instantly, another two were left in a critical condition. It was a shocking (yet all too common) story. I couldn’t help asking myself if we as  driving instructors are doing all we can in order to reduce the chances of this happening to those we have taught to drive.

How can ADIs help?

When we discuss overtaking with ADIs coming to use for development coaching, many will say that they talk about overtaking with most of their learner drivers, but don’t cover it in much detail because practical opportunities to do so rarely arise.

It might be worthwhile for us all to consider how much depth we go into with regards to overtaking. After all, it’s a far more dangerous manoeuvre than all the reversing ones we spend so much time and focus on!

As an ADI, do you explore safe and unsafe places to overtake while out on the roads and the reasons that would make it unsafe or safe? For example:

“Would you consider it safe to overtake on this road? Why not?”

“Where might be suitable to overtake on this road?” “What makes that a good place to overtake?”

Also, do you explore how much time and distance would be needed to overtake safely?

“If we did need to overtake, which gap in the oncoming traffic do you think would be suitable?”

Once a gap is identified, a hypothetical overtake commentary can establish if it is a safe gap. For example:

“So we’d check our centre mirror and right mirror to look for anything overtaking us, maybe gear down for acceleration, signal right, check for anything overtaking us again, move out….. we’d be overtaking the car about now… oh look that car has reached us now!”

This would help the driver see how quickly the gap would close. You could then go on to explore possible consequences of overtaking without a sufficient gap. Do this often enough and the ‘calibration’ process of what constitutes a safe gap (or preferably a gap with NOTHING approaching!) will be better understood and judged by the driver in any future possible overtake scenarios. What’s really important is that they qualify as drivers with all the information and skills needed to make a safe decision… EVERY SINGLE TIME.

Returning to the tragic local story I mentioned earlier, we can only speculate whether or not the young driver’s instructor fully explored safe overtaking during their lessons together. If the instructor did cover this area sufficiently, then lack of kthinking-brainnowledge and understanding may not have been a factor in the crash. Perhaps the driver just made the DECISION to overtake, regardless of the risks. Maybe he was showing off to his mates, was distracted or thought he was invincible, a lot of young people have the ‘it will never happen to me’ attitude. Perhaps his brain development was a factor – the brain’s pre-frontal cortex, which governs emotion, risk-taking and decision-making, does not fully mature until the age of 25.

However, if the instructor didn’t sufficiently cover safe overtaking, then this could be considered one of the contributory factors. As ADIs, we are all responsible for ensuring our learners pass their driving test equipped with the knowledge, understanding and skills to tackle a multitude of real life situations, beyond that which is required to pass the driving test. This includes safe overtaking.

I know it’s hard to cover all aspects of driving in the limited time available, and yes – it can sometimes be challenging to change the pre-formed attitudes and beliefs of the people we are working with. I am sure Ged and I have not always explored overtaking as much as I have mentioned here with our own pupils, particularly in the early years of our career – nobody’s perfect!

But we like to think that all the ADIs we have trained realise the importance of teaching safe overtaking and go out there making sure that all the novice drivers they work with know and understand how to overtake other vehicles.

If you don’t already explore overtaking in depth with your pupils, please start now – you might just save some lives.

down arrowGIVE US YOUR FEEDBACK!  Do you teach your pupils how to overtake safely?  What if no practical opportunities arise?  How does your geographical location affect your ability to teach overtaking effectively? Please share your advice and experiences – we’d love to hear from you.

Finally, if you liked this article and know someone else that could benefit from it, please hit one of the social sharing buttons below!


20 Top Test Tips for Driving Instructors!

test tips for driving instructorsA newly-qualified instructor recently asked me what they need to do on test day, so I decided to put down some helpful test tips for driving instructors so others can benefit from them too. If you’ve been teaching a while and have any other tips to share, please add them in the comments box at the bottom of this post!

Getting ready for driving test day starts well before the day itself. As an instructor, you want to make sure that everything is in place ready for your pupil’s practical test. Here are some tips so that test day goes as smoothly as can be for both of you.

Helpful Test Tips for Driving Instructors

As soon as the test booking has been made…

TOP TIP 1:  If your pupil has booked the test themselves, ask them to print off and bring confirmation of booking (email or letter) to their next lesson. Double-check that the date, time and test centre they have booked are correct.

2-3 weeks before test day…

TOP TIP 2:  Ask the pupil to bring along both parts of their driving licence to a lesson for you to check. This will make sure they know exactly where they are and won’t be rushing around trying to find them on test day! You might even want to ask them where they will put them and make a note of their ‘safe place’. It’s amazing how many say ‘I put them in safe place… I just can’t remember where!’

15582403_sTOP TIP 3:  Check the pupil’s eyesight – it may have deteriorated since the initial check you did with them on their first lesson.  If in doubt, refer them to an optician.

TOP TIP 4:  Run through the safety check questions, making sure they can open and close the bonnet without your assistance.

TOP TIP 5:  Let the pupil know that you can sit in on their test. You can be there to see exactly what happens on their test and give extra feedback at the end as they probably won’t listen to the examiner properly after hearing they’ve passed! Letting them know about this before test day will allow them to decide if they would like you there or not rather than being put on the spot in the test centre on the day. Also let them know that a supervising examiner will need to sit in on tests from time to time. Reassure them that the supervising examiner will be there to assess the examiner conducting the test only, and they won’t actually be ‘tested’ by two examiners! It may be an idea to practice carrying a passenger on a lesson or two so they get used to having an extra person in the car.

The day before test day…

More test tips for driving instructors.

TOP TIP 6:  Advise the pupil to get an early night, have something to eat on the day of the test, and make sure they’re drinking enough (non-alcoholic!) fluids to keep properly hydrated.

TOP TIP 7:  Check your car over. I know most of this goes without saying, but check all the lights are working, check the tyres have sufficient tread depth, are correctly inflated and free from cuts/bulges, check fluid levels, washers and wipers and make sure you have a valid tax disc displayed. Make sure your car is clean and tidy. Finally, make sure the L-plates are on! Obvious I know, but if you take off your roof sign whilst cleaning the car, it’s easy to forget to put it back on, especially if it’s out of sight! Carry a spare set of L-plates in case one goes AWOL and a spare set of bulbs in case you need to make a last-minute bulb change (assuming your car doesn’t need almost complete dismantling to do so, like some do!).

OLYMPUS DIGITAL CAMERAThe big day!

TOP TIP 8:  Make sure your pupil has:

  • Either both parts of their driving licence (check the issue numbers match), or their old-style paper licence and valid passport;
  • Any recent change of address filled in at the bottom of the counterpart;
  • Theory test pass letter;
  • Booking confirmation (again check test centre, date and time);
  • Glasses or contact lenses, if required;
  • Drink/food (bananas are a great natural energy booster). Dehydration leads to poor levels of focus and concentration, so it’s worthwhile you having a fresh bottle of water to hand in case they’ve not had much to drink that day;
  • Anything that may help them keep calm, e.g. music, childhood teddy, herbal calming remedies, bottle of vodka (only joking!)

TOP TIP 9:  Aside from the necessary paperwork, put all valuables, handbags/man bags/rucksacks in the boot out of sight. You don’t want to be doing this at the test centre in full view of any ‘rogues’! It’s a good idea to encourage pupils to leave their valuables in the boot throughout the test rather than leave them on view on the back seat. Thieves are great opportunists and the car will be stationary several times on test.

TOP TIP 10:  Use the pre-test time wisely. This will depend on the needs and desires of your pupil. Some won’t want a full 1 hour lesson before test as they may get tired. Others may like the full hour as a warm-up and to go over any last-minute concerns. Some may benefit from you giving a demo-drive with commentary, others will benefit from a tea or coffee. Make the decision between you as to what will work best for them.

woman-biting-wheel2TOP TIP 11:  If you do opt for a regular pre-test lesson, keep it simple – mistakes may occur due to pre-test nerves and lacking 100% focus on the driving task. This is absolutely normal, so let your pupil know beforehand that it’s normal too.  It can be a good idea to avoid doing any manoeuvres at this point – if one (or more) goes wrong, the pupil may go into meltdown!  Stay close to the test centre area prior to the test, particularly if it’s not your regular test centre and aren’t familiar with the area or there are lots of road works.

TOP TIP 12:  Be positive with your language. Prepare your pupil’s mindset for success rather than failure. Encourage the pupil to be positive, focussing on WHEN they pass rather than IF they pass. Reassure them that if they make a mistake it doesn’t mean they have failed, so they should forget the mistake and carry on so they can minimise any further errors. Let the pupil know that the examiner will write on the test sheet throughout the test – this doesn’t necessarily mean the pupil is making mistakes – the examiner just needs to mark off what has been covered throughout the test to make sure he has assessed everything required.

toiletTOP TIP 13:  If your test centre doesn’t have toilet facilities, ask the pupil in plenty of time if they need a toilet break so you have time to call at a supermarket or fast-food restaurant. Let the pupil know that the test centre doesn’t have toilet facilities so that they realise the importance of letting you know in advance.  Nervousness can cause all sorts of ‘toilet trouble’, so be sensitive to the fact your pupil may need more than one visit!  Another one of the important test tips for driving instructors.

TOP TIP 14:  Arrive at the test centre 5-10 minutes before the test appointment to make sure you can find somewhere to park in plenty of time, allowing time for other learners’ to bay park if your test centre has a car park. Many test centres request that test candidates arrive no earlier than 10 minutes prior to test to avoid congestion in the car park, so do take note of any notices in the waiting room to such effect.

TOP TIP 15:  Check if your pupil wants you present on test, if not, ask if you can be present at the end to listen to the examiner’s debrief.

TOP TIP 16:  In the test centre, make sure your pupil has both parts of their driving licence ready for the examiner to inspect (remove it from any plastic wallet or envelope).

TOP TIP 17:  If you are sitting in on test, sit behind the driver or behind the examiner – whichever you prefer (each have their benefits). You must make no attempt to communicate or signal to your pupil and keep movements to a minimum. If the examiner suspects you are trying to help the pupil, the test will be terminated. So no coughing every time a mirror check is needed!

TOP TIP 18:  If you have not sat in on the test, be nearby when your pupil returns. Make sure you’re in view of the examiner. Wait until the examiner signals to you to come over to listen to the debrief – due to data protection laws, they need to first check with your pupil that they would like you present for the debrief.

beccaTOP TIP 19:  The majority of the time, an instructor will drive their pupil home after the test to allow them time to relax after passing (or sob after being unsuccessful). This can also be a time for them to phone friends and relatives to let them know of the result. Bear in mind that it’s a good idea for you to remove your roof sign and/or L-plates if your pupil will be on the phone – it’s amazing how many members of the public will incorrectly assume that “the instructor in that car gives lessons whilst on the phone”.

TOP TIP 20:  Some instructors allow their pupil to drive home after test – this is a great opportunity for newly-qualified drivers to experience driving with extreme emotion, whether that be elation, giddiness, happiness, frustration, anger or sadness. In a safe environment, you can help the pupil become aware of how their emotions affect their driving, what the consequences might be and discuss what they can do to keep safe on the roads when feeling emotional. It might just help them make the right decision about getting behind the wheel when emotionally-charged at some point in the future when you’re not there with them. There should be no insurance issues if the drive home after test is used for driver development – many driving school insurance policies will prohibit under 25’s from driving for social, domestic or pleasure purposes, so make sure the time is used for the correct purpose.

Our test day faux pas!

Read this and use the test tips for driving instructors to avoid costly problems like these below on testing day.

Turning up a day late for a test after trusting the date and time my pupil had told me.  Lesson learned: always ask to see their written confirmation!

Unbeknown to me and my PDI, whilst checking her driving licence on the walk over to my car, the card part fell out of the plastic wallet and it was left in the car park.  Lesson learned: always ask them to show you their licence and let them keep hold of it. An expensive £111 lesson for me!

Finding out that a brake light on the PDI’s car is not working 10 minutes before a Part 2 test.  Lesson learned: Regardless of how new or old a car is, or who owns it, ALWAYS carry out a thorough vehicle check. Also know where the nearest garage is!

Driving off from the car wash without my L-plates!  Lesson learned: always carry a spare pair!

Booking a test at a test centre I have never used before and then wandering too far away from the test centre and getting lost!  Lesson learned: stay close to the test centre area and/or have the address already programmed into the sat nav.

down arrowCONFESSIONS OF A DRIVING INSTRUCTOR! What driving test day blunders have you made or witnessed? Please share so others can learn from them (and perhaps have a chuckle at the same time!)

Finally, if you liked this article and know someone else that could benefit from it, please hit one of the social media sharing buttons!


Bay Parking Manoeuvre – Room for Error?

Bay Parking Manoeuvre - Girl reversing carThe Bay Parking Manoeuvre (bay park exercise) can be one of the most frustrating to teach and to learn.  Getting the car in between the two white lines first time isn’t always easy, especially from a 90 degree angle to the bay, and when there are no other parked cars in the adjacent bays to help guide you.

But does it have to be done this way?  Not at all!

Two common myths about the bay parking manoeuvre among learner drivers (and even some instructors) seem to be that on driving test day:

1.       You have to park from a 90 degree angle, and
2.       You will fail your driving test if you don’t get the car into the bay in one movement.

Bay Parking Manoeuvre Techniques

A recent trainee driving instructor I was training believed the above to be true because she was told this by her previous ADI trainer.  Many other instructors will have been told the same by their trainers.  Inevitably, this gets passed on to the learner driver.  They too believe they have to carry out the bay park from a 90 degree angle and complete it first time.

The ‘90 degree’ method

Reproduced with permission of DriverActive

The ‘90 degree’ method is often the preferred option by instructors for the following reasons:

  • It can be easier to develop a ‘method’
  • It helps them relate to the reverse around a corner exercise
  • It can encourage the learners to not rely on their mirrors as much.

It can be easier to use reference points from a right angle to the bay, but this relies on the driver starting the manoeuvre from the same distance from the bays, and the width of the bays being the same in each car park.  If these conditions are met, this method regularly results in success.

[Read more…]

The True Benefits of Driver Coaching

Driver Coaching - Driving Instructor CoachingDriver ‘Coaching’ is seen as a dirty word by some driving instructors, not surprising with some of the industry media attention it’s attracted.  But can all instructors embrace the benefits of coaching?  Do you think you use coaching already?  Read on and decide for yourself!

Effective Driver Coaching

To illustrate effective coaching in action, let’s take one example of a risk increasing factor – passengers.  Any distraction can increase the risk of a driver crashing, we all know that.  But the distraction of carrying passengers and the effects of peer pressure are quite often a contributory factor as to why young drivers crash, especially young male drivers.  How do you address this issue with your learners?

As driving instructors, we’re in a unique position to deal with this issue before it results in your learner becoming just another statistic once they pass their test.  You may deal with this issue with your learners already, e.g. you may advise them not to be distracted by passengers, to ask the passengers to be quiet, or perhaps even to avoid carrying passengers, where possible.  And young people have this uncanny ability to let things go in one ear… and out of the other.  In actual fact, some have the determination to do exactly the opposite of what they are told (‘advised’).  I know I did at that age!  Not surprising then that this approach to dealing with crash causation factors, although meant with good intention, will not have a great deal of effect.

Driver Coaching enables the coachee to experience and to learn, to make errors and to find solutions.

[Read more…]

Dealing With ‘Difficult’ Learner Drivers

difficult learner drivers - road-rage-learner“Hey Ged.. I got a really difficult pupil later. Good control of the car but in a ‘boy racer’ way. Very impatient, slightly aggressive to other road users, especially cyclists. He does know all the dangers/hazards but has the ‘it’s their own fault’ attitude. Any advice for dealing with difficult learner drivers?”

Great question! Firstly, the problems of attitude, peer pressure, etc, cannot be dealt with on a superficial level, which ‘traditional’ driving instruction deals with. Rather than concentrate on the dangers/hazards OUTSIDE the car, this guy needs to take a closer examination of the dangers/hazards WITHIN the car, or more specifically… the person sat in the driving seat. For this reason, I would definitely deal with this issue using a coaching approach.

Learner Drivers 10-Minute Extended Lesson Technique

I would first start off by suggesting that this be carried out at the start of the lesson. It may take 10 minutes or so, so if you are conscious of the time taken to do this, ask if it’s ok for the lesson to run over by 10 minutes. Then say something along the lines of, “OK, so what I’d like to do this afternoon is to explore what your thoughts are on driving. So I just want to ask you a few questions to find out your opinions; some of these may be a little challenging, but I’d like you to answer as honestly as you can – that way you’ll get the full benefit. Is that OK with you?”

[Read more…]