10 Tips to Boost Your Driving Test Pass Rates!

Driving Test Pass Rate - boost-your-pass-rate“Hi, Ged & Claire.  Like most ADIs, I really enjoy all your articles and posts, so keep it up! I was, however, wondering if you could offer some advice on improving driving test pass rates…

I’m scratching my head at the moment: I qualified a little under a year ago and started very positively with my pass rate – 8 out of the first 10! However, of late, I have had several unsuccessful attempts in a row. I prepare all learners in exactly the same way, and always ensure they pass a mock test before booking a real one. I am slightly concerned for my reputation, both with learners and with examiners, and am working hard to arrest the slide. Is it my fault? The learner’s? Or are peaks and troughs like this normal? Any advice would be appreciated, as I’m sure I’m not the only one who stresses about their pass rate!”

Well, first, what an achievement. 8 out your first 10 tests passed – that’s great! My first ever learner to test failed, and it was an awful feeling. Yes, peaks and troughs are normal and I’m sure many excellent instructors have had their fair share of ‘bad runs’. No matter how good we are, expecting to have a 100%  test pass rate is unrealistic. We can, however, do everything we can to improve. It’s worth mentioning that this is no one’s fault or failure. You’re just learning from experience. After all, a FAIL is just the ‘First Attempt In Learning’ and if they do fail it’s not a matter of life and death. To put it into perspective, it’s just a test! And they can take it again until they do pass. 

How to Improve Driving Test Pass Rates

10 Top Tips which I hope you will find useful in improving your driving test pass rate.

Tip 1 – Monitor

magnifying-glassIf you want to know what you’re good at and what you could improve on, measure your results. Taking a photo of the driving test report or copying a test report onto a blank one will allow you to keep records of what your learners are picking up faults on. Is there a trend? When I did this, I found that I was getting quite a few driver faults on mirrors, including the odd serious one. I decided to remove my eye mirror, and the learners became aware of when I was watching them. This prepared them for being watched by the examiner, and also became a subliminal prompt. After that, my mirror faults decreased significantly!

Tip 2 – Shut up (in the nicest possible way!)

quietThis has always been a particular challenge for me.  Even on ‘mock’ tests, and certainly in the lessons on the run up to the test, it’s easy to overlook how much help you are actually giving your learners. Getting them used to total independence for set periods of time will not only prepare them for the test conditions, but also give you insight into how much you actually help them without thinking about it!

Tip 3 – Use records

A common question after around 8 lessons is, ‘When can I book my test?!’ If you use records, it’s much easier to show the learner what they need to be able to do BEFORE they book their test and what standard they need to reach for all the topics listed. ‘When you have covered all these topics and can do them without my help, shall we crack on and get that driving test passed?’

Tip 4 – Syllabus

Sounds simple, but do make sure your learner can deal with everything required for the test and much more! Allow your learners to experience a wide variety of areas, types of road and traffic situations – the more variety, the better. They will become better all-round drivers, and much more capable of dealing with situations on their test. That said, if there are any tricky bits or junctions where ‘local knowledge’ is needed on test routes, it’s best to make sure they can deal with them confidently, too.

To download a copy of the DVSA’s ‘Safe and Responsible Driving Syllabus’, click here.

noTip 5 – Say NO!

We have all had the learner who books a test when you know you have more chance of winning the lottery than getting a pass from them. Some learners deteriorate after booking the test, some come to us with a test already booked. If they’re not ready, say NO and stick to your guns. It’s your car, and your reputation. If they can’t meet the requirements for the test, don’t take them. Make sure your terms and conditions cover this.

Tip 6 – Pick the best time

Some people work best in the morning, some in the afternoon. Find out what works best for your learner and book a test to suit. I also used to avoid the rush hour test times and the school kicking-out times. The kids from the school round the corner from my local test centre used to play ‘chicken’ with learners: not great when your learner is already under a lot of stress!

Tip 7 – Does your learner feel ready?

Irrespective how how ready YOU think they are, confidence in their own ability will help your learners deal with test day nerves. If they don’t want to do their test just yet, let them decide when they do want to do it. What do they want to achieve before they take their test? Can you help them achieve that first? Having goals will help create a sense of confidence. ‘When I can do Manchester Street roundabout, I know I will be able to deal with anything on my test’.

woman-biting-wheel2Top 8 – Deal with test day ‘nerves’

Learners will naturally have some degree of nervousness on their test day. What helps them relax? Is there relaxing music that they can listen to before the test? Do they need a cigarette (assuming they smoke, of course!)? Accommodate their needs and make sure you allow sufficient time to do so. Some won’t want to drive beforehand. If that’s what works for them, then great. Learn some basic breathing techniques to help them relax. Make them laugh. Encourage them to have a brisk walk to the end of the street and back. Have some Rescue Remedy in the car, even if you don’t believe it works. If they think it will, then it will! Ask them to tell you again what passing the test will give them. Motivation is a powerful force!

Tip 9 – Eliminate negative language and self-talk

Be positive, and encourage your learners to do the same. This applies not only to the test day but also to the days leading up to it. Those who have trained with me will know that ‘if’ is banned in my car, as is ‘hopefully’. They are equal to swear words! ‘If I pass my test’ becomes ‘WHEN I pass my test’ and ‘Hopefully I’ll do it’ becomes ‘I WILL do it’.

Also, be aware of and eliminate any negative body language. Walk to the test centre with your learner proudly, smile and say ‘hello’ to your fellow colleagues and the examiners. Present a positive environment to your learner (even if you have to fake it!) 😉

what-the-mind-expects

Tip 10 – Be positive about all the examiners

Learners are influenced by what their mates tell them. ‘I hear one of the examiners never passes anyone there’. A simple reframe will quell any fears. ‘Really? I have an 80% test pass rate with him!’ People see what they expect to see. It’s much more useful for your learner to go in thinking that the examiners are all nice and looking to give out a pass than to believe they’re all evil and waiting for the chance to fail them – which, of course, they aren’t 😉

down arrowHave you any further advice that you would like to share?  What has helped you improve your driving test pass rate?

Please let us know in the comments below.

If you like this article, please share it!


“Just check your b****y mirrors!!!” (Part 2 of 2)

26-02-2014 21-17-46In the first part of this article, we explored how to effectively develop our learner drivers’ mirror use.  If you missed it, we’d strongly advise you read that part first – click here to read Part 1.

In the second part of this article, we will be looking further into the cyclic nature of the Look – See – Respond routine.  Also, we’ll check out some higher level techniques to ensure your pupils not only continue to use their mirrors with better levels of understanding, but will learn to develop their own effective strategies to deal with situations arising behind them.

The ‘Silent Conversation’

In Part 1, we took some time to explore some examples of questions to use at the RESPOND phase of the routine. Although many instructors encourage their learners to look for cars, cycles or other vehicles behind or to the sides, it’s not these objects that cause crashes – it’s the driver of that vehicle that is responsible for their course of actions.

It can be helpful to consider the cyclic nature of the mirror routine as a ‘silent conversation’ between you and the other driver or rider. Not only do we need to respond appropriately to what we see in the mirrors, we also need to take into account how the driver/cyclist behind responds to our response. And having LOOKED and SEEN how they respond to our actions, we will then need to again RESPOND accordingly… and so it goes on!

So, assuming it’s daytime and you have a decent view of the driver behind, try asking your learner questions such as:

What’s the driver behind doing?
Is the driver behind paying attention?
What do you notice about the driver behind?”

Female driver talking by mobile telephone and doing make-up.It may be that they are arguing with a passenger, distracted by their children, bopping away to a really good tune, lighting a cigarette, picking their nose (ewww!), texting/chatting on the phone, putting on makeup (okay, some women are distracted sometimes, too!). I’m sure we’ve all seen what other drivers do while at the wheel.

Once you’ve identified what the driver is doing, explore how this will affect your pupil’s decisions – in effect, how they will ‘communicate’ with that driver. You could ask:

How can we make allowances for him?
What can we do differently with our speed on the approach to these lights?
How early should we start signalling for our turn?”

Once the learner has replied to your question and/or taken action, encourage them to LOOK and SEE how the other driver has RESPONDED to our ‘communication’:

What’s happening behind now?
Have they recognised what we’re doing?
How is he responding / What is he doing now?
Do we need to do anything else now?”

A painful experience

A few years ago, one of my former franchised instructors was giving a lesson to one of his pupils.  During this lesson, they had a crash which could potentially have resulted in very serious injury or even a fatality.

The learner driver was just a few weeks away from taking his driving test.  During this particular lesson, he was approaching a zebra crossing with a pedestrian walking towards it.  The instructor was watching the learner driver to see if he had checked the mirrors.  On noticing the learner’s lack of mirror use, the instructor failed to intervene, because (in his words after the crash) “he had his driving test booked and should have known what to do!”  There was no mirror check or any early positive indication that the learner had seen the crossing or the approaching pedestrian.

Only at the last moment did the learner driver see the pedestrian.  He then slammed on the brakes… hard.

AmbulanceMeanwhile, the learner and instructor had both failed to realise was that there was an enormous quarry lorry close up behind them.  Needless to say, when the learner driver slammed on the brakes the lorry couldn’t stop in time.  The lorry crashed heavily into the back of the instructor’s car pushing it through the zebra crossing.  Fortunately the pedestrian hadn’t started crossing – imagine the outcome if they had 🙁

This whole situation could have easily been averted.  Regardless of the standard of the learner driver, it is always the instructor’s responsibility to keep everyone safe.  On identifying the pedestrian crossing early and failing to see any response from the learner driver, the instructor could (and should) have asked something along the lines of:

What hazards do we have up ahead?
How close is the truck behind?
What will you do with your speed?
How is the driver behind responding?”

Developing Coping Strategies:

I’m sure most of us have experienced how learner drivers can get flustered with drivers following closely behind.  We explored this more fully in our ‘Dealing with aggressive tailgaters’ article.  As covered in that article, you may want to explore how to get out of the way if the driver behind seems totally distracted.  By doing so, they are no longer a concern, especially if your pupil seems on edge about having them behind. In both of the examples below, the ‘silent conversation’ between me and the driver behind helped avoid potential crashes…

Example 1: Looking for a POSITIVE RESPONSE

Whilst driving home from work recently, the driver of a supermarket delivery van was following about an inch from my bumper (OK, so that might be a slight exaggeration, but he was still really really close!)  I could see that he was occasionally glancing at the road but that most of his attention was directed at something on the passenger seat – maybe his delivery schedule.

My first thought was, “I don’t want this guy behind me; I’ll pull up and let him pass”.  I didn’t pull up as normal though – I signalled left and kept my speed at 30 mph.  I continued to drive until I got a positive response.  I saw that he had seen my signal because he began looking in his right mirror to look for an opportunity to pass me.  Only then did I slow down to pull up – he ‘spoke’ to me before I responded.  Had I not waited for the positive response and reduced my speed before he recognised my signal and intention to pull over, I would undoubtedly have ended up with an embarrassed van driver and a ton of groceries in my boot!

Example 2: Using observation links

A couple of years ago, whilst waiting to turn right into a side road, I saw a car approach a T-junction further up the road.  It shot straight over the give way lines and only stopped when almost at the centre line on the major road!  I made my turn and watched in my mirrors to see if the car would turn into the road behind me.  It did.  Before reaching the end of the road where there was a mini roundabout with just a left or right exit to choose from, I instinctively decided to turn into an empty car park without losing much speed, as I didn’t want the car behind to get too close to me.

The driver behind may have not have stopped at the previous junction for a number of reasons – perhaps he didn’t realise it was a give way junction?  Maybe he was distracted, drunk or under the influence of drugs?  Regardless of his reasons for doing so, I wasn’t feeling comfortable being in front of him so I turned off as soon as I could.

Car AccidentSo what happened next?  He continued to the roundabout, failed to stop and drove straight into the lamp post on the other side of the roundabout!

These are just 2 examples of when crashes may have been averted (away from me anyway!) by using the LOOK – SEE – RESPOND – LOOK – SEE – RESPOND cycle.  These examples also illustrate the importance of using ‘observation links’ within this cycle (clues as to what other road users are likely to do next).  This is what our pupils need to be able to do as well. They need to interpret the other driver’s response in our ‘silent conversation’ – does the driver behind recognise what you’re doing?  Is he responding appropriately or is he ignoring you?

ATTITUDE WARNING!

Road Rage FrustrationSometimes, thought-provoking questions relating to the behaviours of drivers behind can highlight your learner drivers’ poor attitudes towards other road users.  Your learner may scold the driver behind for using his mobile phone or for driving too closely, or for whatever other bad habit the driver behind is displaying. Instead of displaying similar levels of aggression by rebuking the other drive, think how you could use the other driver’s behaviours as a valuable learning opportunity.

What effect could that have on him? What about us? What could be the possible consequences?

You could then ask your pupil to identify what possible ‘bad habits’ they may develop once they’ve passed the driving test?  Just how attached are they to their phone? What if it rang whilst they were driving?  In what situations might they be tempted to answer it?  How are they for time-keeping?  What if they were running late for work, an interview, appointment or party?  How rowdy are the friends that they will be offering lifts to?  How might that impact their driving?  What strategies will they have in place to deal with it?

Are you up for the challenge?

Challenge Blue MarkerLet’s look back at the example questions we provided in Part 1 of this article when encouraging your pupils to LOOK and SEE what’s there…
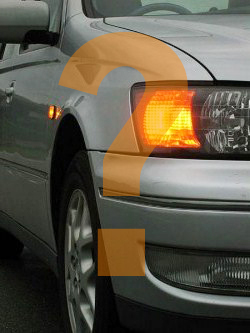
What’s going on behind?
How close is the car behind?
How fast is the car behind going?
Are there any bikes coming down on our left?
Is there anything overtaking us?”

What’s missing from all these questions?  That’s right – the word ‘mirror’ isn’t mentioned at all.  Our challenge to you would be to try and eliminate repetitive reference to the ‘mirrors’ from your everyday teaching and instead to use awareness questions.  You can start doing this from the very first lesson!

‘Bottom-up’ instruction

Try to avoid the ‘bottom-up’ approach to teaching.  This is a typical trait of some PDIs and ADIs (especially those training for Part 3 or who have recently qualified).  For example, when teaching their pupils how to move off, they will often instruct in the following way:

Have a quick check in your centre mirror, then check your left blind spot, left door mirror, centre mirror again, the road ahead, right door mirror, and your right blind spot”

This simply gets the pupil to LOOK, but no further parts of the routine are explored.  Some lessons later, the instructor goes on to help their learners understand what they’re looking for (SEE) and then some will get around to exploring how the learner driver should RESPOND to what they see in the mirrors.

Signal or not?Other bottom-up approaches include encouraging the pupil to routinely apply the right signal when moving off for the first time (“just for practise”), rather than to LOOK, SEE and RESPOND appropriately to what is around us at the time.  Read our article on signalling for more guidance 😉
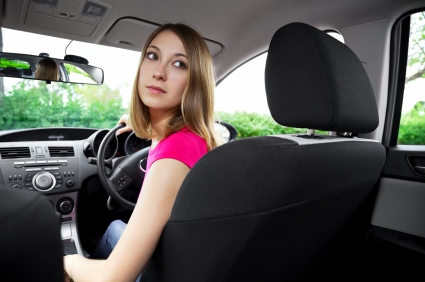
Unfortunately, such short cuts make life MUCH harder for the ADI and the learner in the long run – the bad habit of just looking blankly in the mirrors will have already formed from those early lessons and may be very hard to break at a later stage.  This is why we may often see the pupil quickly glance at the mirrors (and apply the right signal), but we know full well that they cannot possibly have had the opportunity to fully assess what they can SEE (and therefore signal accordingly).

‘Top-down’ instruction

Top-down teaching, on the other hand, is where we would start with the reasons for effective all-round observation, followed by directions on what specifically we need to be looking out for, and how to respond to (or ‘communicate’ with) what we see. A top-down approach is more likely to create a natural response and natural awareness within your learners, which naturally becomes much harder for them to forget! An example might be:

So now we have the car prepared, it’s important for us to look for a safe opportunity to move away, so we need to be aware of what’s happening all around us… so let’s first look to see if there’s a safe gap behind… then have a sweeping check all around… Anything coming out of the driveway over our left shoulder?  Any cyclists coming down our left side? Still clear behind?  Is it safe ahead?  What about our right side – any vehicles coming up to overtake?  And is there anyone emerging from the junction over your right shoulder?  What would be our best course of action?  Would it be safe to go now, do you think?  Would a signal benefit anyone?” etc…

learner-blind-spotAlthough this is an example of an instructional approach, a coaching conversation would work really well, too.  Yes, top-down approaches will take a little longer in the short-term, but the long-term benefits definitely outweigh this.
So, ask yourself if there is there any more you could be doing to encourage your pupils to have a better awareness of other drivers’ behaviour.  How could you work on helping them to communicate better with others on the road?  How can we help them be aware of their choices once they’re out there on the road themselves?

*Disclaimer:  Throughout these articles, I have referred to drivers who exhibit poor driving behaviour as ‘he’.  This is just for ease of writing – it isn’t because I think men are impatient and generally daft drivers at all… honest! 😉

down arrowHave you any further advice for Paul (who originally asked the question about mirrors) that you would like to share?  What techniques or strategies have you used with your learners that has been successful? How do you incorporate the skills that kill (using phones, speeding, driving under the influence, showing off, etc) into your everyday teaching?

Please let us know in the comments below – I’m sure it will be appreciated by many.

If you like this article, share it so someone you know might benefit too by hitting one of the social media buttons below.

“Just check your b****y mirrors!!!” (Part 1 of 2)

check-your-mirrors“Hi Ged and Claire, I’m getting really frustrated with my pupils not checking their mirrors, they do it sometimes when I ask or tell them to, but then go right back to forgetting again when I stop helping them.  What can I do?”

This is probably a very common frustration for a lot of ADIs, so rest assured you are not alone!  I know I’ve had the same issues in the past, too and you can feel like a bit of a nag or a broken record repeating yourself every 2 minutes!

The problem with some pupils is that no matter how many times we tell or ask them which mirrors to check, unless we keep at it, some will keep forgetting. So what can we do differently so they are less likely to ‘forget’?

I like to think there are 3 elements to effective mirror use:


26-02-2014 21-17-46

LOOK

Many instructors stop after teaching this first part.  So invariably the pupils LOOK but don’t SEE.  This is more likely to happen when the instructor says things like:

Check your centre and right mirror before signalling
Which mirrors should we check?
New road, new mirrors
Remember – Mirror… Mirror… Signal
Come on, check this left mirror, you keep forgetting!

Any of these sound familiar to you?

Although these questions or commands may well instigate a mirror check, the check in itself has very little value.  The pupil is simply learning by rote, or ‘parrot fashion’.  They know they need to check them – after all, you’re there to keep reminding them!  But this is not an effective approach for long-term learning.  They are checking the mirrors because they think they have to check them to pass the driving test (and to stop your constant nagging!).  You’ll get a similar effect with chants or ‘easy reminders’ like “One Two Three” relating to centre mirror (one), door mirror (two), signal (three).  Another one we hear being used a lot on lessons is “Mirror, mirror, signal”.

Learners who are taught in this way can pass the driving test.  And afterwards, they’ll breathe a huge sigh of relief and think, “Yes! I passed! Don’t need to check my mirrors all the time now!”

SEE

Many instructors get to this part easily, although not always often enough.  This is where we start getting to the WHY.  In the ‘look’ part of the sequence, they learner looks in the mirrors but they won’t always ‘see’ what’s there.

InattentionalBlindness_021012_For the most part, the reason for this is that the learner has no idea what they are specifically looking for.  They’ve simply been told or asked to check the mirrors (as in the examples above).

So how can we direct their attention a little further?  Here are some examples of better questions to ask:

What’s going on behind?
How close is the car behind?
How fast is the car behind going?
Are there any bikes coming down on our left?
Is there anything overtaking us?”

These are much more efficient questions than some of those I used to ask in my early days as an ADI, such as, “What colour is the car behind?” [‘Red…. so what?!’].  And then there were also times when I would cover the interior mirror with my right hand and ask, “What’s behind?” These tactics don’t necessarily encourage the pupil to do much more other than check the mirrors more frequently to avoid getting caught out! There’s still no guarantee they’re considering the proximity or speed of vehicles behind.

And this brings us to a secondary issue that we need to be aware of – and that is ‘inattentional blindness’.  This is a psychological phenomenon which relates to our failure to notice unexpected visual stimuli when we are focussing on another task.  Driving demands a great deal of attention and focus for the novice driver, and their focus is largely on the control of the vehicle and the things going on in front of them.

Many of you will have seen this video (or ones similar to it) before, but if not, here’s a great illustration of inattentional blindness in action:

We could write a whole article on the perils of inattentional blindness when driving, but let’s focus back on the topic of effective mirror use for now…

In essence, we tend to notice what we are looking for – what we are expecting to see.  By asking poorly-phrased or poorly-directed questions, the learner driver does not notice the things which they should be noticing – those things which are of a high priority and could have an effect on our driving plan.  As experienced drivers and instructors, we may notice that the driver of the bus behind is glancing down at a newspaper, or that the driver of the car behind is more pre-occupied with their screaming children in the back seats than they are focussed on the fact we are braking to a stop.

driving-instructor-questionsAppropriately phrased questions will help bring these higher priority things to the learner’s attention – things which they may not have even considered paying attention to, or were ‘blind’ to due to overwhelm.

So ‘seeing’ isn’t about knowing if your pupil has checked the mirrors or even seen what’s there.  Instead, it’s about creating a connection between using the mirrors and knowing what to look out for.  It doesn’t really matter if they’ve seen the car behind, or if it’s red, blue or polka dot, what matters is that they realise they need to recognise what the car (or driver) behind is doing, e.g. distracted, driving close, approaching too quickly, overtaking, etc.

Now the pupil is looking and seeing what’s there, they’ve started to understand WHY there’s a need to check the mirrors… or have they?

RESPOND

If the pupil knows what they’re looking for, it might mean they understand what to check for, but not necessarily why that’s important and how to interpret and respond to it.

Let me share a short story…

I once asked a pupil of mine to turn right at the next traffic light controlled junction.  We were travelling along a dual carriageway and we needed to change lanes.  She looked in her centre and right mirror. “Great,” I thought to myself, “she knows which mirrors to check and so she’s seen the red car travelling at high speed who’s about to overtake us”.  She then went to signal and steer.  I pulled the wheel back and cancelled the signal and said “there’s a red car there!” She replied “Yea I know!” I was gobsmacked.  If she saw the car, why on earth did she try to change lanes as it was about to overtake us?!

Her actions and words told me that she had looked in the correct mirrors and had seen the red car, but she simply didn’t know how to respond to what she had seen.  She had actually thought the driver would let her go once she started signalling so we worked through what could have happened and what to do next time.

Fortunately this happened on a driving lesson and not after she had passed her test. Imagine that scenario on a crowded motorway! :O

The point is that until then, I didn’t realise how important it is to make sure (and not just assume) that the pupil knows how to respond to what they see in the mirrors.  It meant that I hadn’t been doing my job properly and it was a valuable lesson for me to make sure every pupil knew how to respond correctly to what they had seen.

Because this golden opportunity doesn’t present itself all that often, and because there never seems to be a cyclist coming down the left hand side when your learner is turning left, sometimes we as instructors can forget this important step in developing our learners’ effective use of mirrors. The ‘what if’ question can be the most important question to ask.

How close is the car behind?  What would you do if it was really close?
Are there any cyclists coming up on our left?  What would you do if there were?
Is there anything overtaking us?  What would you need to do if there was?

If you get a blank expression or “erm… I don’t know” as a response, then brilliant – you can save this driver from making a costly mistake once they pass their driving test!  You know that they don’t really understand the significance of using the mirrors effectively, and this can be a big enough reason for them to ‘forget’ to check and for you to keep having to remind them over and over again.
You can also explore different options and how they may need to respond:

If the driver behind was really close, what would we do differently with our speed/signal before our next turn?
What would be the benefits of doing that?

If there was a cyclist coming up quickly on our left, how might it affect the timing of our signal?
What would be the problem of signalling to turn left if he was very close to our car?”
“What if he was a lot further away? Would you do anything differently?

What would you do with your speed/signal if you were being overtaken and you wanted to turn right?
How do you think that would benefit us and the driver overtaking?

Once we turn, if the new road is clear and the car behind is following really closely, what could we do with our speed?
If the driver behind looked like he was about to overtake us, what would we do with our speed then?

ged-claire-mirrorsFinally, it’s important to notice that the diagram at the start of this article is cyclicThe process is continuous – after responding, we need to once again LOOK and SEE how the driver or cyclist behind/on our left/passing is in turn responding to our action.
Now what you should achieve is lots more value attached to mirror use.

The pupil has a deeper understanding of their importance, will want to become more aware of what’s going on around them and more importantly, will be able to make decisions on how to respond to what they see.

down arrowIn the second part of this article, we will be looking further into how being aware of the actions of other road users around us affect our learners and how they can develop strategies to deal with these situations.  Click here to read Part 2!

For now, please share your experiences!  Please let us know how you develop your learners’ effective use of the mirrors – what questions do you find get the best results?  Your comments in the box below could really help other instructors improve their skills 🙂

7 Top Tips for Easy ADI Diary Management

adi-diary-managementADI Diary Management and Diary planning is an art form in itself. Learning to plan your diary efficiently can help maximise your time, boost your profits and reduce your fuel costs.  It also enables you to ‘work to live’ rather than ‘live to work’. Many new instructors struggle with diary management, so here are 7 tips on how to manage your diary more effectively, based on our own experiences.  We hope you find the ADI diary management tips useful!

ADI Diary Management – Top 7 Tips

TIP 1 – Decide on your hours of work… and STICK TO THEM!

OK, this sounds pretty obvious I know. When you have a ‘normal’ job (i.e. in employment), you have a specific start time and finish time.  You also know the days you have to work and the days you have off. Why make an exception now that you’re your own boss? For many of us, it’s the main thing that attracted us to becoming a driving instructor in the first place – working when we want to!

adi life moves fastSo what day(s) off do you want? What time do you want to start and finish work? Ok, so you may have to make the odd exception to fit in that new pupil on their birthday but having strict parameters will help you keep work contained within the times and days YOU want.

TIP 2 – Pre-plan your diary

Organising your diary into set time slots will avoid pupils requesting awkward lesson times which prevent you from fitting in other people… leading to more dead time! So for example, if you do 2 hour lessons, your regular slots might be something along the lines of 9.00am-11.00am, 11.20am-1.20pm, 2.00pm – 3.00pm, 3.20pm – 5.20pm and 6.30pm – 8.30pm (granted, you may occasionally have to deviate from these times for test bookings). Let pupils choose the best time for them in the slots available rather than allowing them to book when THEY want. A pupil deciding they want a 10.00am lesson can effectively cost you the first working hour of the day if you would normally start at 9.00am.

Pupils will fit in with YOU if you choose to run a structured system.

TIP 3 – Encourage pupils to take longer lessons

Many instructors offer lessons lasting 1 hour.  Others have a minimum duration of an hour and a half or even 2 hours.  Encouraging your pupils to take longer lessons will increase their rate of learning, decrease ‘dead time’ or travelling time between hourly lessons – thus maximising your work time and profits.  A profitable  ADI Diary Management tip.

TIP 4 – Book pupils in for several weeks in advance

If a pupil usually has the same time each week, it’s a good idea to forward book the same lesson time in the upcoming weeks.  Booking pupils in only one week in advance can be a real headache and prevents you from planning further ahead and can result in regular pupils losing their normal slot. Also, changing a pupil’s lesson time each week will often lead to them forgetting their lesson or cancelling at the last moment. Just pencilling in the pupils first name, or highlighting the reserved lesson in a different colour on electronic diaries will keep it reserved until the pupil confirms their regular booking. This will make it harder for you to double-book or give a regular slot away by accident and can be done for many weeks in advance. It’ll also help you identify what spaces you have left for your shift workers and new pupils.

TIP 5 – Subtly manipulate your diary

It’s can be a real pain when a pupil wants their driving lesson smack bang in the middle of the day when the rest of your day is free, especially if your other pupils are already booked in! Or perhaps you have a couple of lessons in the afternoon and another pupil books the first lesson of the day leaving you with a gap in the middle of the day.  There’s an easy solution to this…

If the pupil can’t see your diary (if you’re using your phone, for example) then just offer the times you want to fill first, “I have either 10.15am or 1.45pm available on that day”.

If you use a tablet or paper diary and your pupil can see it, this becomes a bit trickier and they may point to the middle of an empty day asking if they can have that time. To help you make sure pupils book the lesson slots you want to fill first, and to make your diary appear busy (great if you’re starting up), add ‘fake’ names or shaded areas to areas of your diary that you’d like to fill last.  This will mean pupils wanting to book in only have the opportunity to take the available time slots you want to fill first. For example, if the last lesson of the day is empty and you still have availability earlier in the day, use a fake pupil name and the pupil will have to choose one of the other available times. If it ever backfires and the pupil can only do the later lesson, you could always say you will ask if the other (fake) pupil will swap, (which they always will of course!) and it looks like you’re going the extra mile to accommodate your pupil.

On another note, putting any “serial cancellers” as the last lesson of the day will occasionally net you an early finish! You can work on replacing any of these pupils with more reliable ones as you get busier.

TIP 6 – Manage your coverage area

iStock_000013048926XSmallTry to narrow down your coverage area, where possible.  Yes, that’s easier said than done for some people.  If you’re a new ADI, you’ll probably have to start with a wide geographical area and narrow it down as you get busier. Or it may be that you live in an area that’s not densely populated.

Either way, if you cover lots of areas, is it possible to give lessons in one area on one day and another area on another day to avoid longer travelling times and higher fuel costs?

TIP 7 – Learn to say ‘NO’

saying no is okI know what you’re thinking… “Say NO? You’re kidding right?!”

If you’re building up a new business, this isn’t normally an option. But if you’re working your socks off and you get yet another customer wanting to book lessons with you, you have a choice. Start work earlier, finish later, work your day off OR simply choose to not take on the work at that time. You could start a waiting list – if the pupil definitely wants to learn with you, they will wait. Even if they don’t wait, the supply of new pupils won’t come to a complete stop because you said no, there will always be more!  Finally, saying ‘no’ is proof of your popularity – any pupils that you turn away because your waiting list is full will still be more than impressed by how great you must be!

down arrowLet us know what works for you. Do you manage to get the time off you want? Do you find yourself hanging around in between lessons? We love hearing from you, so please add your thoughts and other ADI Diary Management tips in the comments below.

Finally, if you liked this article, please share it on Facebook and Twitter – simply hit one of the social media buttons below.  Thanks!


10 Tips to Reduce Driving Lesson Cancellations

Reduce Driving Lesson Cancellations - meme-from-iphonetextgenerator(1)Time is precious.  And for driving instructors, lost time equals lost income.  Using the top ten tips to Reduce Driving Lesson Cancellations can save you time and money. Yes, it’s great to be able to catch up on other essential business matters when last-minute lesson cancellations arise, but we all have bills to pay. So what can we do to minimise cancellations and loss of income?  Here are 10 top tips:

Reduce Driving Lesson Cancellations – Top Tips!

Tip 1 – Be upfront and honest:

In our experience, this is the number one way to reduce your cancellation rate. Don’t take it for granted that pupils will understand the ins and outs of self-employment, because the vast majority won’t.  For those of you that are franchisees, many learner drivers will incorrectly believe that you are paid a wage by the company named on your roof sign, so when they cancel, they’re actually not affecting you at all – as far as they’re concerned, the ‘company’ just loses out. For most people (and especially teenagers), this will be the first time that they will be held financially accountable for cancelling an appointment of any kind.  Try to think from your pupil’s perspective – they don’t have to pay when cancelling their dentist, doctor or hairdressing appointment!  So why does their driving instructor want paying for a lesson they haven’t provided?!  Don’t expect them to be psychic or to just read the fine print about cancellations on your website or on the back of their appointment card. Whether you work for yourself or on a franchise, take a few minutes to candidly explain how important it is that they give you plenty of notice if they need to cancel.  Don’t put it across in a threatening way – just explain in an honest and friendly tone how it affects you and your business if they cancel at late notice.  At the same time, make your commitment to them – that if you ever need to change their lesson date or time, that you will compensate them too.  This builds trust and shows your integrity – they are much more likely to respect you for it. chargeOutline the conditions for cancellation (see below) and end the conversation by simply asking for their verbal understanding, “so are we OK with that, or do you need me to clarify anything?” Ignore this first tip at your peril –  if you decide not to heed this advice, don’t be shocked when a pupil who’s called a few hours before their lesson to cancel gets a bit shirty when you tell them they’ll have to pay for it!

Tip 2 – Have clear, accessible Terms & Conditions

Having clear terms and conditions is a must if you want to enforce payments for cancellations. Terms and conditions need to be fair and work both ways. If your customer cancels and is held financially accountable, surely it’s only right that you offer some form of compensation if you cancel, too? tcMake your terms and conditions easily available, have them on your website and appointment cards.  Go through cancellation policies at the time of booking and/or on the first lesson. Even so, it can be hard to enforce and if reliable customers have a genuine reason for cancelling, waiving the cancellation on that occasion can make good business sense. You don’t want to lose an otherwise reliable customer all because you charged her for a lesson when she was in hospital with her son.

Tip 3 – Don’t GIVE them the excuse!

I remember meeting an ADI for some skills development training a few years ago.  He was really down-in-the-dumps about his cancellation rate, which in that particular week was over 50%!  I asked him about his terms and conditions, how he explained them to his pupils, and how strictly he enforced them.  His reply went something like this: siteen“Yes Ged, I tell them that they have to give me 48 hours’ notice of any cancellations, otherwise I’ll charge them.  But obviously if they’re ill, I don’t want their germs, so it’s fine to cancel then” When I asked him what the pupils’ reasons for cancelling that week was, can you guess what his reply was?  Yes, you got it – “they’re all ill”.  Hardly surprising, was it? It’s a good idea to waive the lesson fee if your pupil is genuinely poorly, but don’t tell them in advance that this will be the case, or else the same excuse will be used every time they just can’t be bothered with their driving lesson!

Tip 4 – Keep regular lesson slots

Where possible, keeping the same time and day for pupils can help reduce the likelihood of them cancelling. Having the same time allows the customer to plan the rest of their week around this regular commitment.driving When lessons are moved around a lot it’s easy for the pupil to ‘forget’ when their lesson was or double book that lesson time with some other commitment.  Also, bear in mind that if you keep changing their lesson time around from week to week, they’ll expect you to allow them to do the same. Having said that, do bear in mind that learners will benefit from experiencing driving at different times of day, so moving a lesson time to another ‘regular slot’ for a few weeks should work well.

Tip 5 – Be reliable

This is one that I feel is extremely important. I like to treat others the way I want to be treated. So if you want your customers to be reliable, you need to lead by example. It may suit you to ask that customer if they can do their lesson earlier (because someone else has cancelled) or if they can do a different day (because you don’t want to go out for just their lesson that afternoon) but be warned! If you think it’s acceptable to expect them to regularly change their plans for you, they will the same in return!

Tip 6 – Take payment in advance

When Claire worked as an independent ADI, she asked for payment in advance. On the first lesson, she charged for 2 lessons. This never caused a problem and she always made her cancellation policy clear. If she had a cancellation, it was already paid for and they would need to bring payment for 2 lessons next time to be in advance again.  If you’re on a franchise, you may be restricted by the policies of your franchise agreement, but if you’re independent this is a good way to reduce cancellations AND be paid for the cancellations that you do get. Claire noticed a big drop in cancellation rates when she started implementing this method.  Great tip on how to reduce driving lesson cancellations and not lose money or a client.

Tip 7 – Encourage block bookings

save20It’s much easier to charge for cancellations when you have the money up front. Block booking discounts offer an incentive for customers to pay for 10 hours at a time, but is your incentive enough? We noticed a big difference in the amount of pre-payments for blocks of 10 hours when we put our hourly rate up but kept the block booking the same. Instead of a £10 discount, customers get £20 discount (almost the price of a 1 hour lesson!).  Now customers are much more likely to take advantage of the £20 saving.
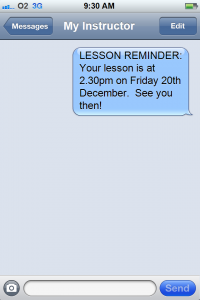
Tip 8 – Buy slots in advance

In really restricted weeks (such as the week between Christmas and New Year), it may be an idea to book slots well in advance. Not all of us like working these days, I didn’t as a full day of lessons soon became a day with a lesson in the morning and one in the afternoon after the cancellations had come in (family party/ill/hungover, etc). The next year I decided to ‘sell’ these slots on a first-come-first-served basis. I would have slots available for each day I worked and if my learners wanted a lesson between Christmas and New Year, they would pay for it in advance to secure the slot. Do keep the money separate though! If you can’t do the lesson for whatever reason (e.g. adverse weather or illness), they have still paid for a lesson and you don’t want to work the first week in January knowing you’ve already spent the money for those rescheduled lessons!

Tip 9 – Give out appointment cards

I think most ADIs use appointment cards, but there are still some that don’t.  Yes, the pupil forgets to bring it sometimes, or they lose it.  Simple answer for that – give them a new one.  Just one lost lesson at £24 will pay for a bulk purchase of around 1,000 cards, so it really is worth the investment! Use one side of the appointment card to outline your terms and conditions – this way your pupil always has them to hand when they’re thinking of calling to reschedule their lesson.

meme-from-iphonetextgenerator(1)Tip 10 – Reminder texts or emails

SMS reminders or emails can be sent out to your pupils, manually or automatically, to remind them of their lesson time and date.  A message can be sent out a couple of days in advance of their lesson so that they remember when their lesson is booked for. Results for this strategy can vary. When we had these for our driving school customers, some instructors said they reduced cancellations and some said they had more last minute cancellations. We’d be interested to hear what your experience has been if you use reminder texts or emails. down arrowWhat other strategies do you use to minimise cancellations and loss of income? Was has worked well and what hasn’t worked so well? We’d love to hear your stories so that others can benefit from them too. Finally, if you liked this article, about how to Reduce Driving Lesson Cancellations please share it on Facebook and Twitter – simply hit one of the social media buttons below.  Thanks!